Article by : MEGA Tech Magazine, Hexagon Metrology (Thailand) Ltd. & Carl Zeiss Pte.Ltd
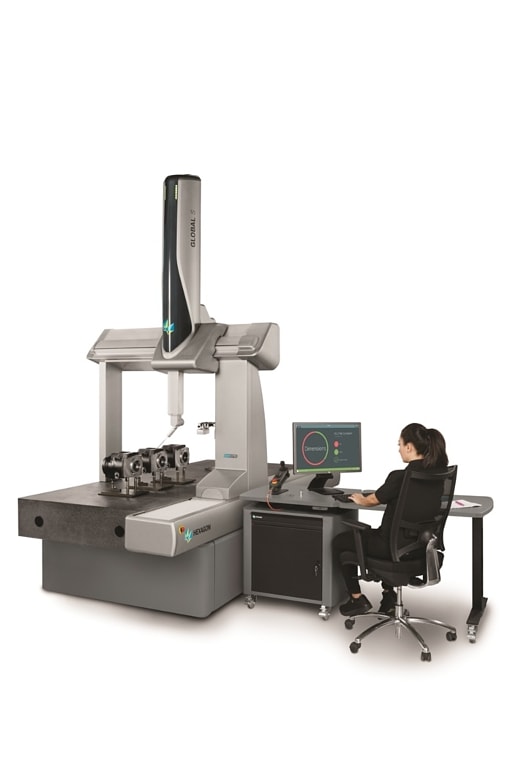
Recent developments from Hexagon Manufacturing Intelligence focus on how the user experience of interacting with CMMs impacts productivity. Simple additions such as etched scales on the measurement volume, visual indicators of machine status, and ergonomically-designed workstation and jogbox options all lighten the load for operators and help ensure measuring cycle times match production requirements. The company has also launched an environmental monitoring system for CMMs to help validate results and minimise downtime. This technology helps avoid bottlenecks and ensures the quality department is supporting productivity goals.
“Improving machine capability is important, but we have to ensure we’re adding value for our customers,” says Marc Stalker, CMM Strategic Product Manager at Hexagon Manufacturing Intelligence. “Where one manufacturer’s priority might be accuracy, another’s may be throughput – and this means we need to help them take time out of their process and maximise machine utilisation.”

As well as developing value-add technologies for the CMM, Hexagon is rethinking the role that quality plays in manufacturing. In a market where consumer perceived quality is increasingly important, the company is encouraging manufacturers to embrace a holistic approach to quality. Hexagon is unique in providing computer-aided engineering (CAE) and computer-aided design/manufacturing (CAD CAM) software alongside its metrology portfolio, and Stalker believes this offers new potential to customers.
“Capturing data for quality checks doesn’t create value in itself,” he explains. “But making real-time metrology data available to all your stakeholders is a game changer. For example, simulation models could be validated by real data; machine tool paths could be corrected based on real data. Our aim is to share useful data throughout the product lifecycle without creating information overload. Data needs filtering to be useable.”
Earlier this year, Hexagon announced its ‘Autonomous Connected Ecosystem’ strategy and launched Xalt to help enable it. The Xalt framework brings together cloud computing, edge computing and artificial intelligence technologies designed to deliver the data orchestration Stalker describes. So, what does this mean for the quality department?
“The ability to autonomously process data delivered by CMMs and bring AI into the decision-making process – that’s exciting. That’s changing the value of quality and driving real productivity.”

It is now possible to inspect sensitive, reflective or low-contrast surfaces more quickly than ever before with the ZEISS O-INSPECT multisensor coordinate measuring machine.
The switch to the ZEISS DotScan sensor for all multi-sensor measuring machine models will offer several advantages to customers. Unlike with a chromatic focus sensor (CFS) sensor, operators using the ZEISS DotScan can switch it in and out as needed. “This saves a lot of time and increases flexibility – particularly at companies that manufacture very different products,” says Christoph Stark, Product Manager at ZEISS Industrial Quality Solutions.
The sensor is available in three sizes for different measuring ranges: one, three and ten millimeters. Moreover, operators can now use a rotary table on the ZEISS O-INSPECT to optimum effect with the ZEISS DotScan for optical scanning. This feature was previously not available for the CFS sensor. “You save a considerable amount of time with the ZEISS DotScan,” says Stark. The measuring speed of the sensor, which is dependent on several factors, ranges from 100 to 150 mm per second.
Due to the innovative integration of the sensor in all interfaces, the operator can insert the probing system in the measuring software and capture the data points on the component using the standard ZEISS CALYPSO user interface without any difficulty. Stark expects this new innovation to be a hit with customers: “We are confident that this sensor will significantly increase our customers’ efficiency.”
With ZEISS DotScan it’s also possible to distinguish transparent lacquered surfaces from other underlying metallic layers and was previously available as an option with ZEISS coordinate measuring machines.

